
Getting Started with ContextForge MCP Gateway on macOS
A step-by-step guide to installing and running ContextForge MCP Gateway locally on macOS

I recently began exploring the ContextForge MCP Gateway on my macOS. To do this, I followed the setup instructions from the official GitHub repository. This post documents the steps I took to install and run the gateway locally on macOS.
This is the first in a short series of posts. In this one, I focus on setting up the MCP Gateway. I have not yet connected the gateway to any MCP servers—that will be covered in a future post.
Background
What Is the Model Context Protocol?
The Model Context Protocol (MCP) defines a standard way for AI agents to invoke external tools, APIs, and prompt templates. Instead of implementing custom integration logic for each action, an AI agent can issue a generic request to an MCP server, which exposes a registry of available capabilities. The protocol separates the agent’s reasoning from the mechanics of how tools are discovered, invoked, and secured. This design enables modular, scalable integration between agents and real-world systems.
Why MCP Gateway?
Building an MCP server is the easier part. Integrating it cleanly with AI agents? Not so much.
It starts simple—an AI agent calling one MCP server for a database, then another for search, maybe a third for file storage.
But as the number of MCP servers and tools grows, things get messy:
Servers use different logins and authentication flows
There are too many endpoints to manage and secure
AI-generated requests lack guardrails and observability
Integration logic clutters the AI agent’s codebase
While building MCP servers for my own projects, I started to see how the above issues could pile up quickly. That’s when I began exploring ContextForge MCP Gateway, an open-source middleware from IBM.
The MCP Gateway sits between your AI agent (MCP client) and your tool-specific MCP servers. It provides:
Centralized login across servers
A single endpoint to access multiple tools
Built-in observability (logs and a web UI)

macOS Setup Instructions
The following steps describe how I set up and ran the MCP Gateway locally on macOS (M2 Apple Chip).
Prerequisites
Before beginning, I ensured that I had the following installed:
macOS with Python 3.12 (the MCP Gateway requires Python 3.10 or higher)
Step 1: Install uv
uv is a fast, Rust-based tool for managing Python packages and environments.
To install it, run:
curl -LsSf https://astral.sh/uv/install.sh | sh
To make sure it's on your shell's PATH, add the following line to your shell configuration (e.g., .zshrc or .bashrc), or run it directly in your terminal:
export PATH="$HOME/.local/bin:$PATH"
To verify the installation, run:
which uv
uv --version
Step 2: Create a Project and Install the Gateway
To create a project directory and set up a local Python environment, run:
mkdir mcpgateway
cd mcpgateway
uv venv --python $(which python3.12)
source .venv/bin/activate
To install the MCP Gateway inside the environment, run:
uv pip install mcp-contextforge-gateway
Step 3: Start the MCP Gateway Server
To set the password for the default admin user, run:
export BASIC_AUTH_PASSWORD=pass
To set the JWT secret key for signing tokens, run:
export JWT_SECRET_KEY=my-test-key
To start the server, run:
mcpgateway --host 0.0.0.0 --port 4444 &
This command starts the server in the background, listening on all network interfaces at port 4444.
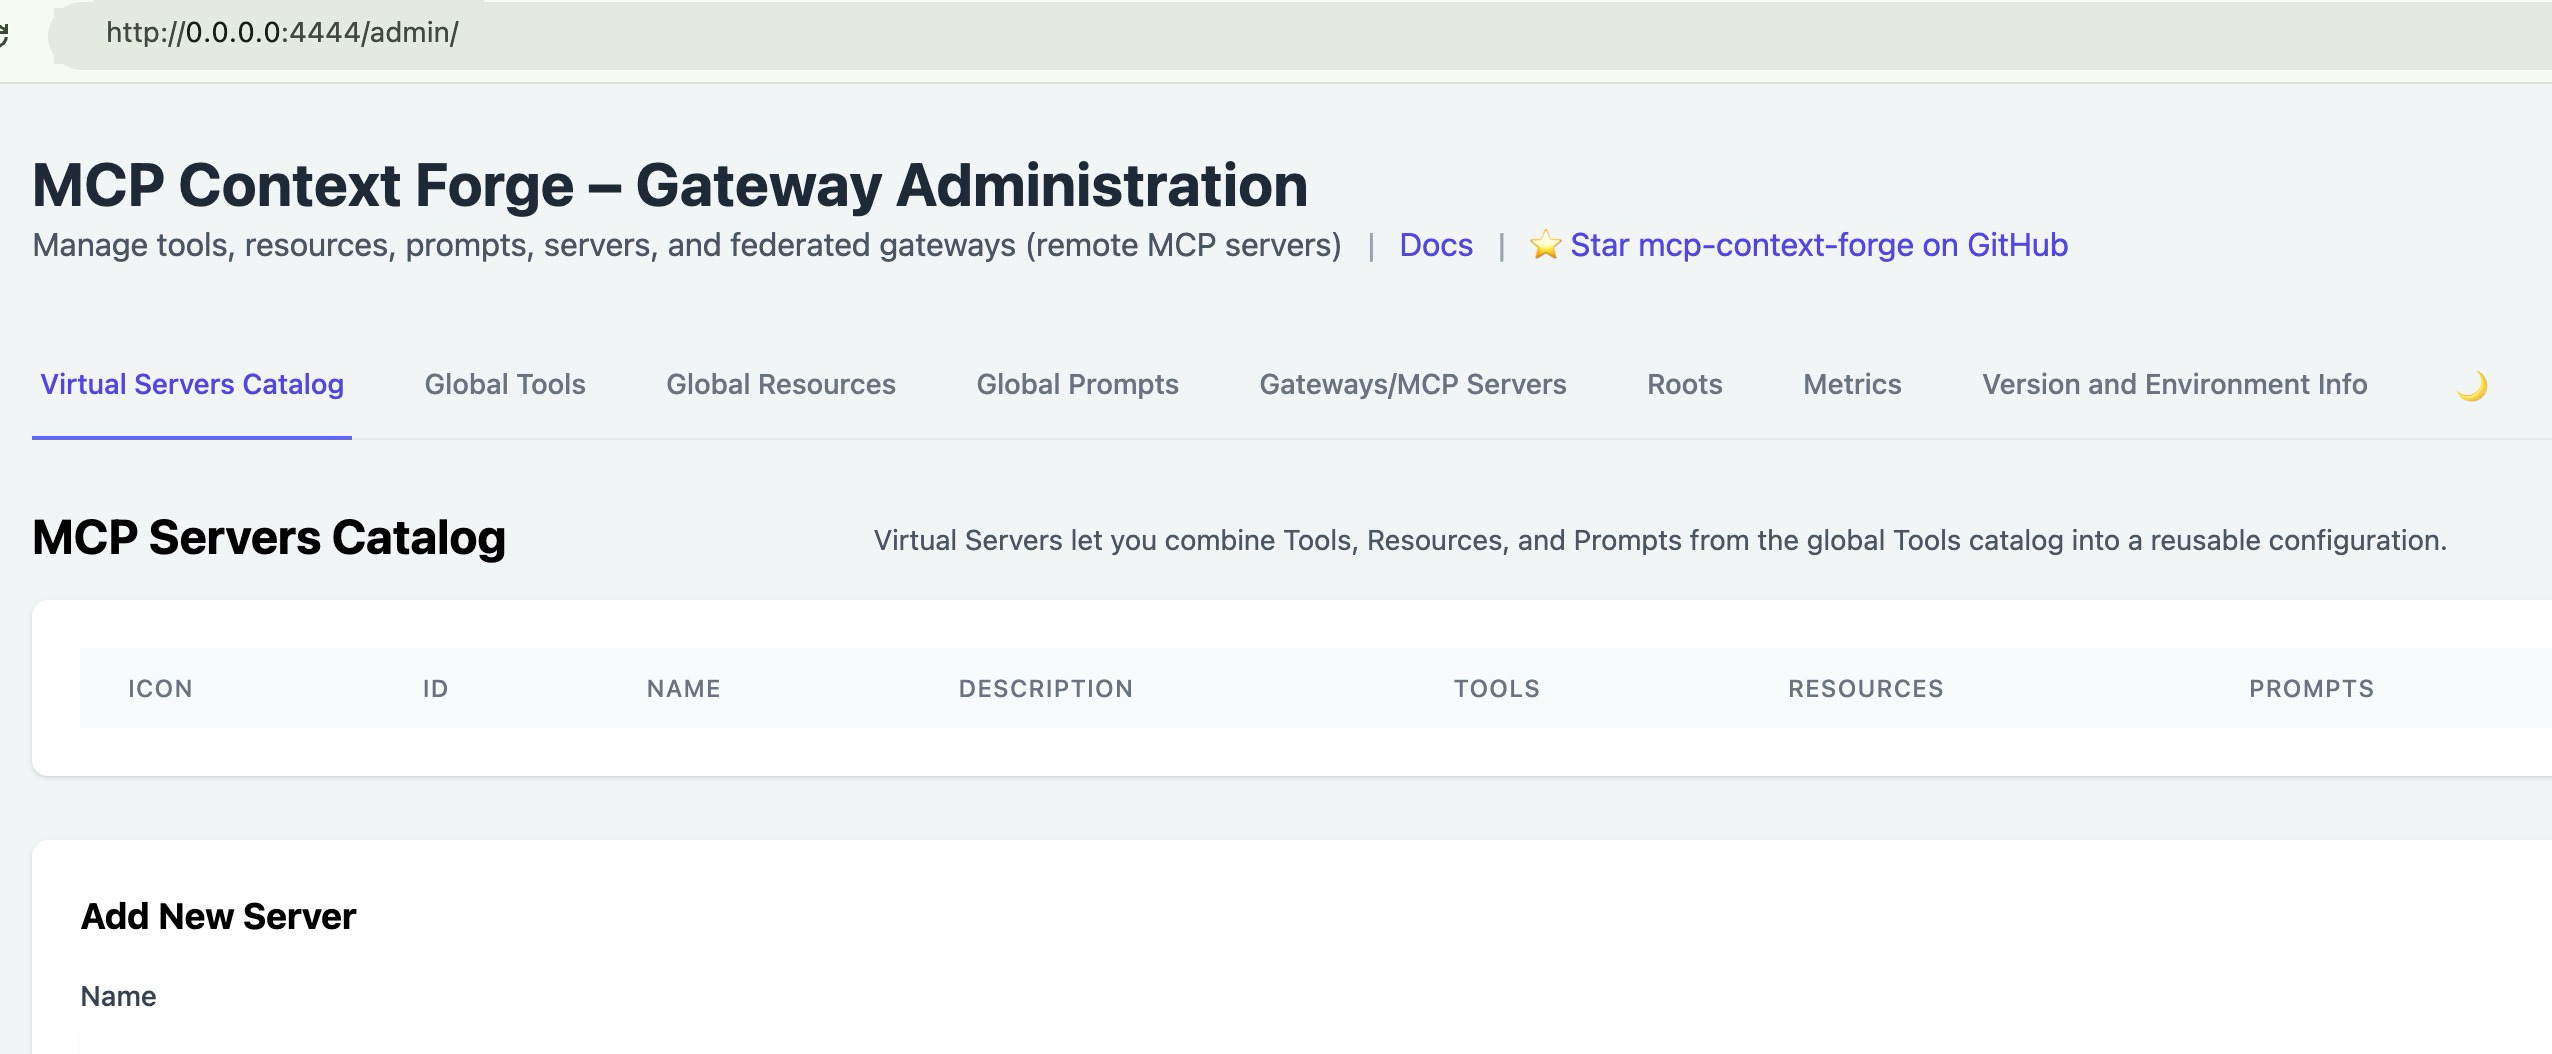
To access the admin UI, open a browser and go to:
http://0.0.0.0:4444/admin
To log in, use the following credentials:
Username: admin
Password: pass
This loads the administrative interface for the gateway.
Step 4: Generate a Bearer Token
To authenticate future requests, create a bearer token:
export MCPGATEWAY_BEARER_TOKEN=$(python3 -m mcpgateway.utils.create_jwt_token \
  --username admin --exp 10080 --secret my-test-key)
This token is valid for seven days and is used to authorize calls to the gateway.
Step 5: Test the Gateway
To confirm that the server was running and accepting authenticated requests, use the following:
curl -s -H "Authorization: Bearer $MCPGATEWAY_BEARER_TOKEN" \
  http://127.0.0.1:4444/version | jq
This returned version metadata in JSON format.
This concludes the local macOS setup. The steps closely follow the instructions published in the MCP Gateway GitHub repository, with slight expansions and clarifications added for readability.
Next Steps
Now that the MCP Gateway is set up and running locally, the next step is to start using it by registering one or more MCP servers behind it.
The official ContextForge MCP Gateway repository includes a dedicated section that shows how to do this in a local setup:
End‑to‑end demo (register a local MCP server)
In a future post, I plan to follow that path and walk through how to connect MCP servers to the gateway and route tool requests through it.